

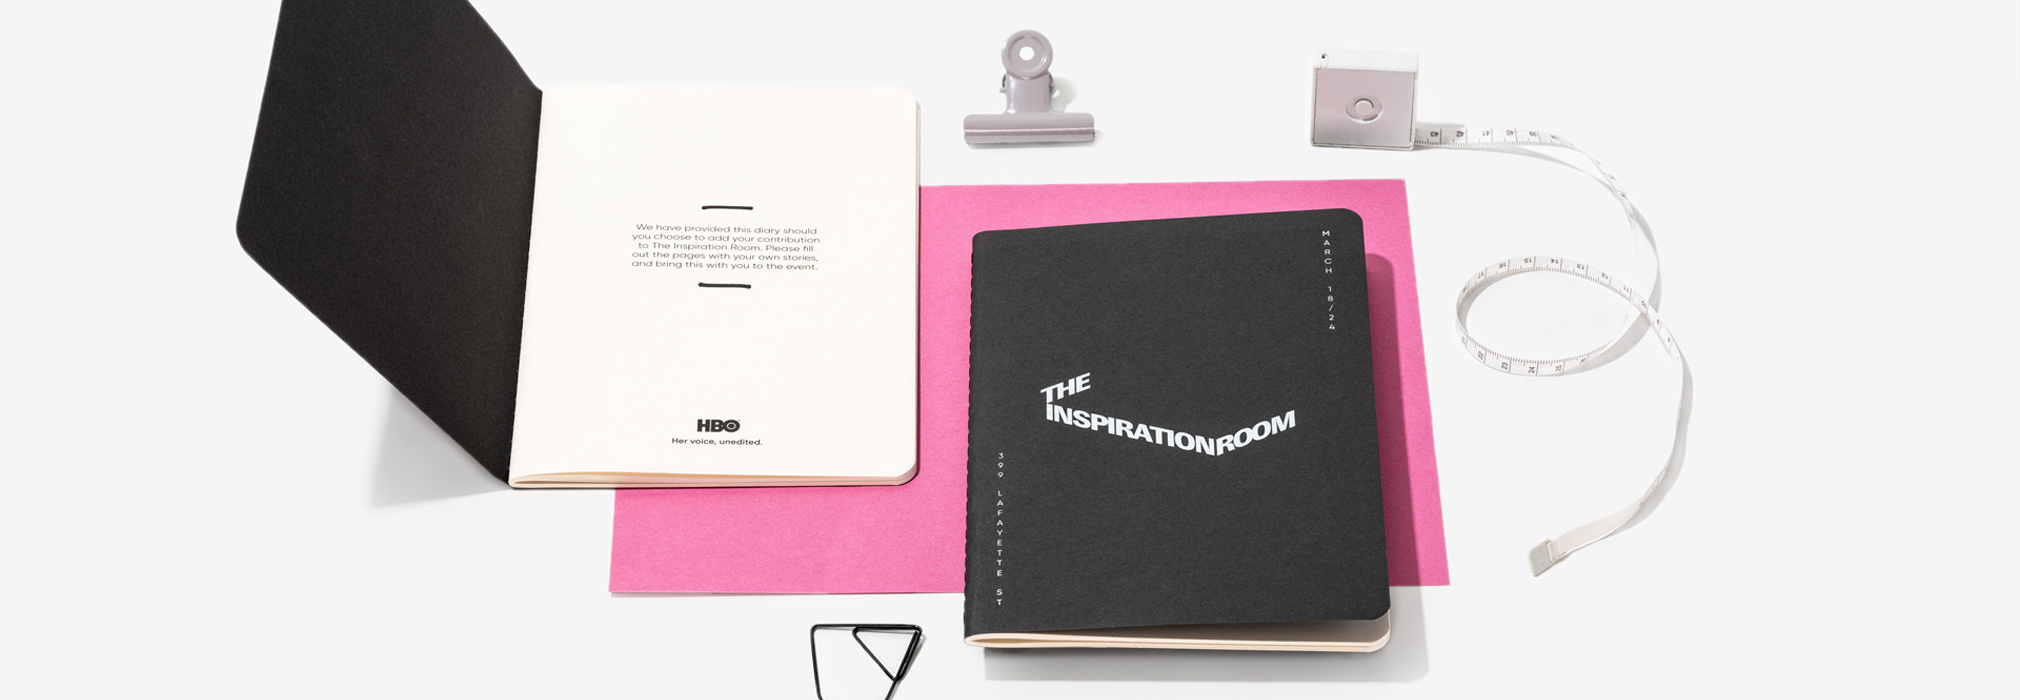
Custom Printed Insert For Stock Notebooks
Custom-printed inserts are personalized pages designed to be added to our ready-to-brand notebooks. They provide an excellent way to include promotional materials, branded content, and personal touches in your notebook. This approach offers a cost-effective alternative to creating a fully bespoke notebook while still achieving a customised and professional look for your stationery.
Custom printed inserts can be placed at the start of your book and must consist of 1,2,4,8 or 12 pages. All inserts can be printed full colour CMYK, single colour or Pantone (minimum 150 units) and can be printed on a range of paper stocks including Gloss, Matte, White, Ivory or Coloured Paper.
Artwork requirements
We need your inserts to be provided to us in a full colour or B&W colour range (this will depend if you’re printing in colour, B&W or single colour) within a print-ready PDF. The PDF needs to be exported with 300 dpi resolution and CMYK colour profiles (unless printed in pantone). Ensure you use vector artwork for any logos or text to maintain clarity at all sizes.
- Your logo or design should be in vector format.
- Ensure all text is ‘outlined’ to make it vector format
- All images are embedded within your file
- PDF should be exported to CMYK Colour
- PDF Should be exported with all marks and bleeds
- PDF Should be exported in single page view
- Name and organise your layers correctly within the template
If your notebook is going to be fully or partially printed then here’s a breakdown of what we require:
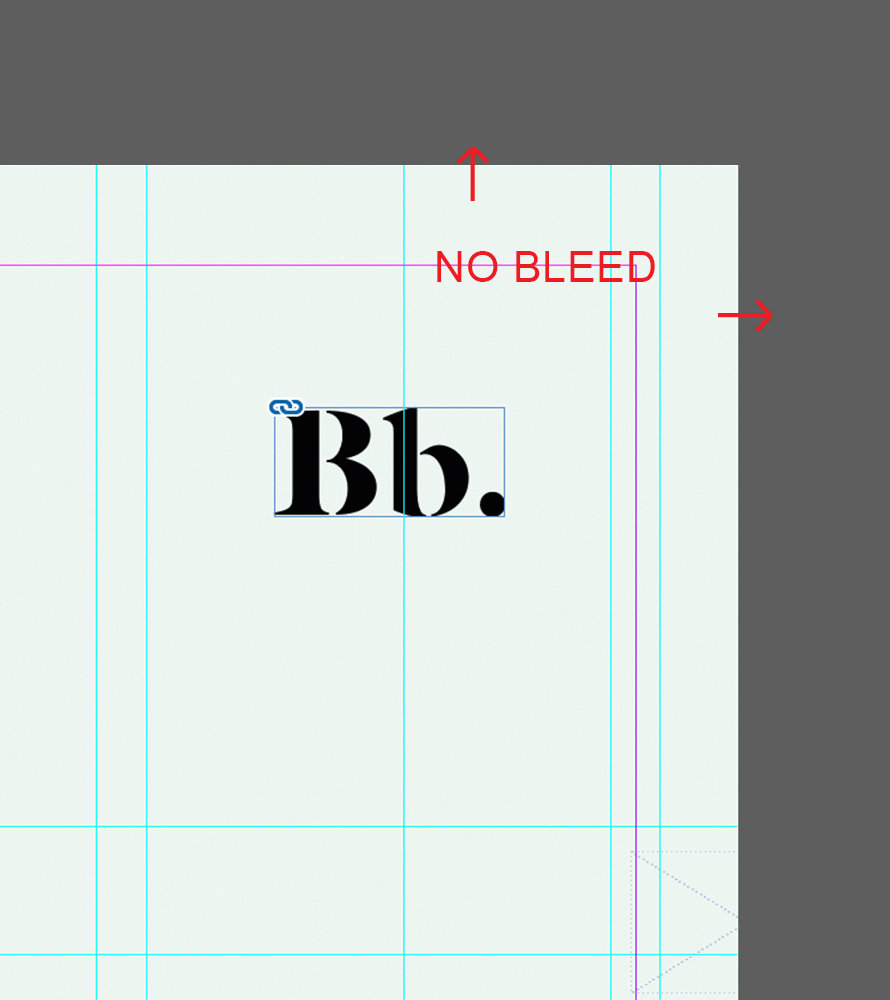
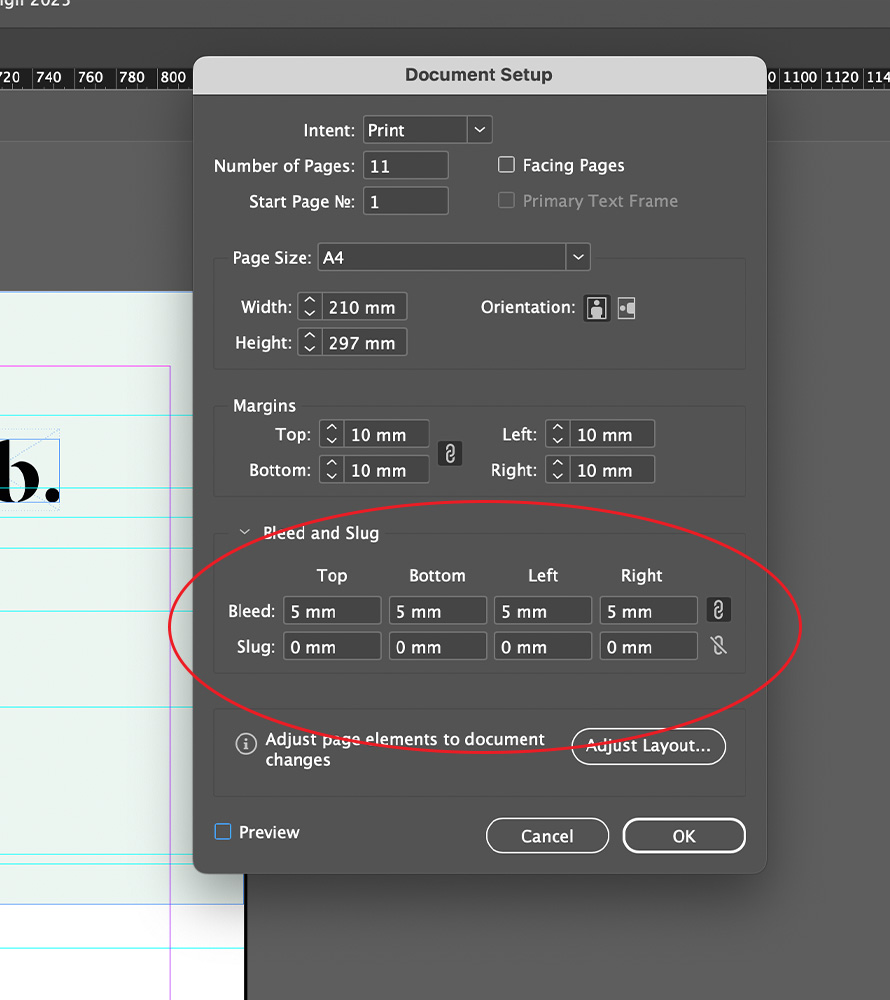
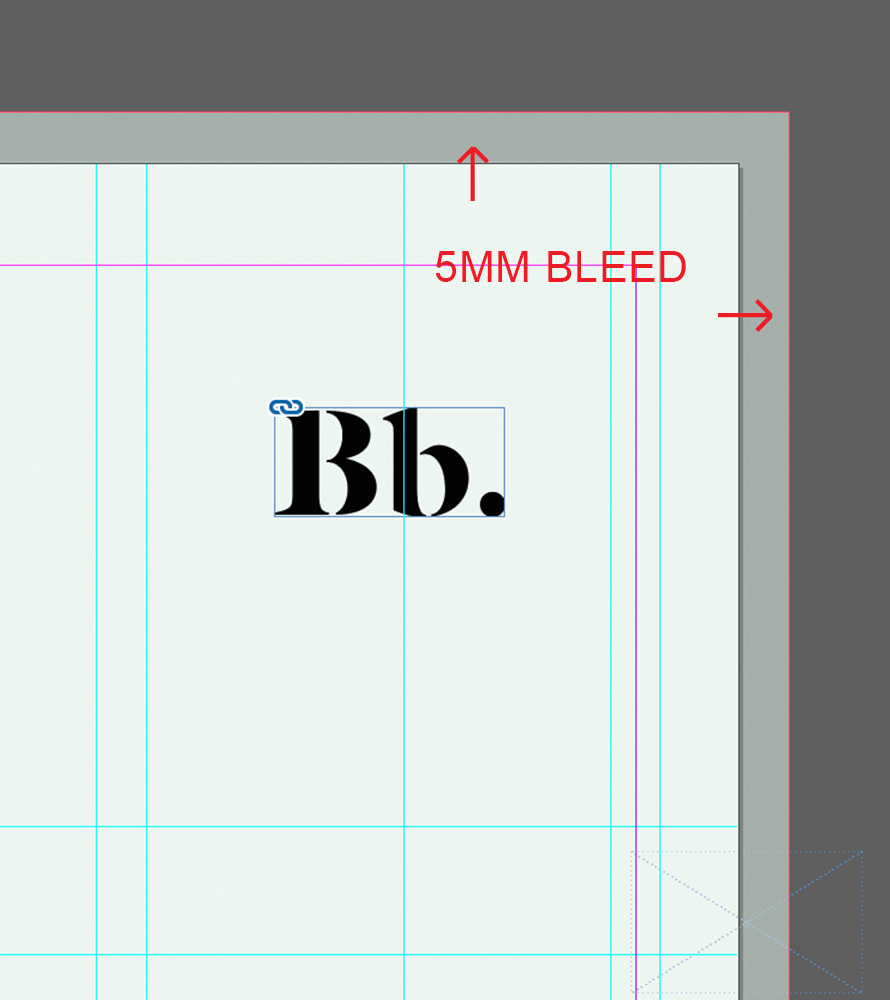
5mm Bleed
Bleeds are areas of your artwork that extend beyond the edge of the final printed page. They ensure that there are no white borders when the paper is trimmed. To add a bleed in InDesign simply click in File > Document setup, once you’ve added 5mm to your document settings make sure to also move the artwork off the page all the way to the bleed line.
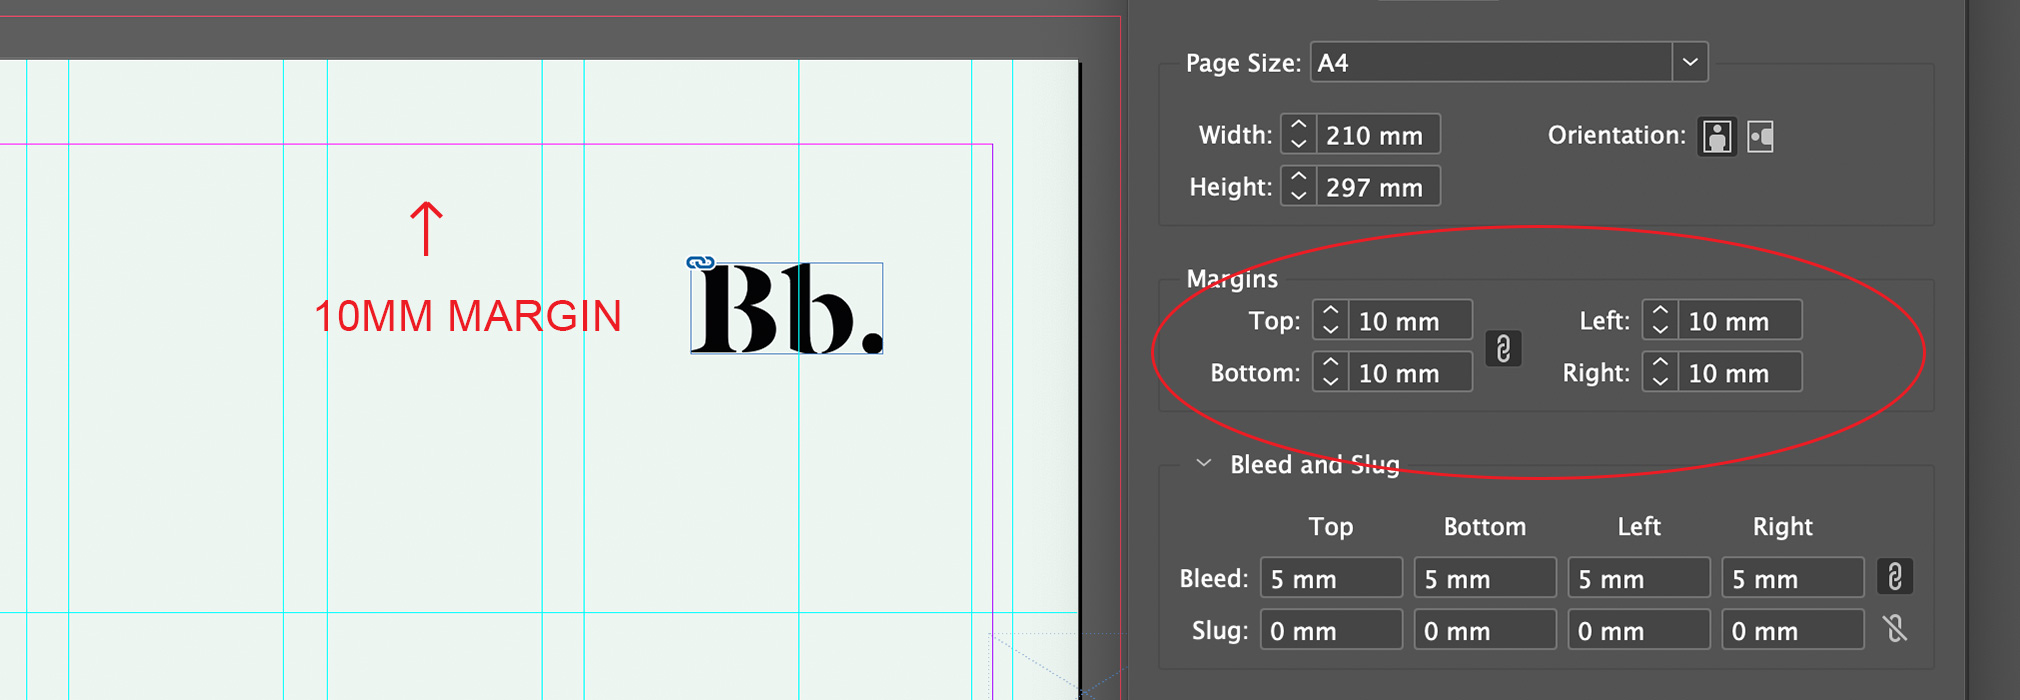
10mm Margins (at least)
All of the important elements of your artwork (text, logos etc) should be placed at least 10 mm from the trim line. Mark out the ‘safe areas’ by adding in some margin markers. Margins are set when you first create your file, you can also add and adjust these later on by clicking Layout > Margins and Columns
Please note that for ringbound notebooks we suggest adding a larger gutter, this is dependent on the ring mechanism size and your notebook. To get more guidance on this please speak to your account manager.
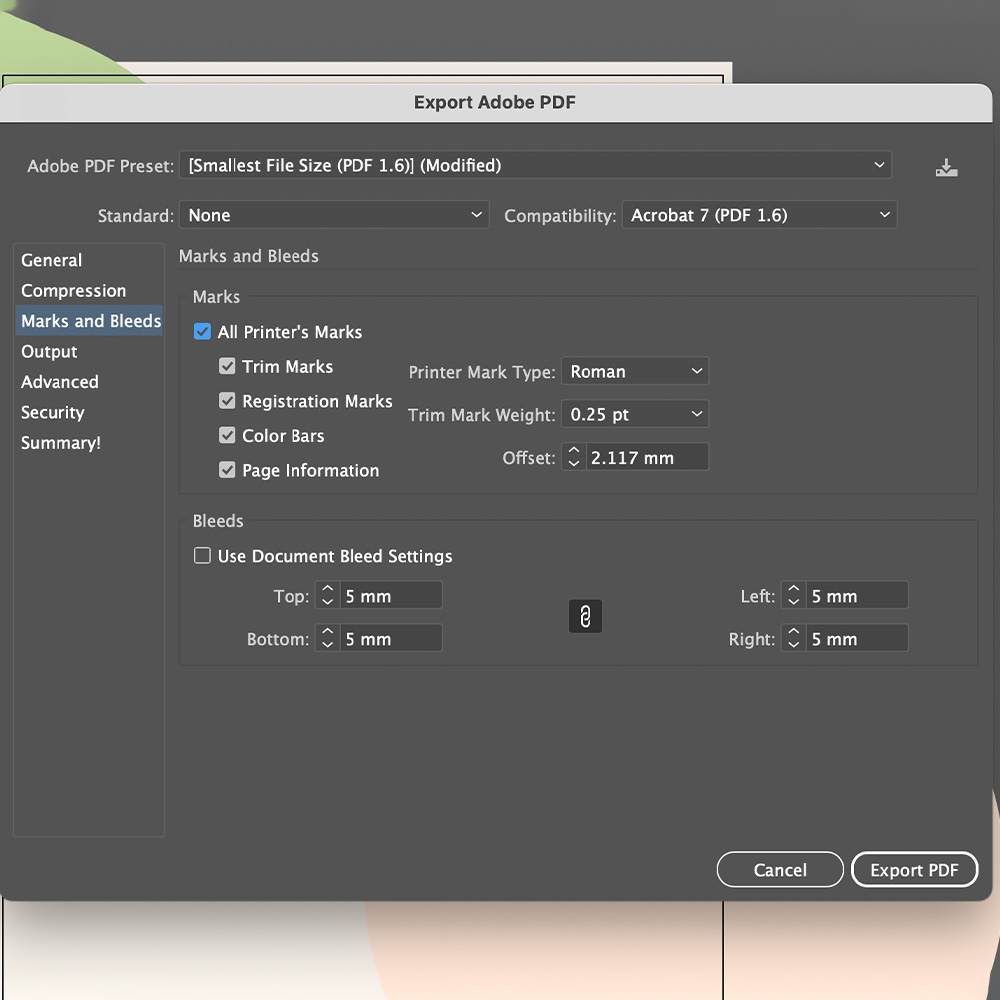
Exporting Bleeds and Marks
We ask that you export your files with all of the mark options available on InDesign, these will help us with the placement and crops for the final print.
How to: In your InDesign file click File > Export > Save As PDF > Bleeds and Marks.
Please note that for ringbound notebooks we suggest adding a larger gutter, this is dependent on the ring mechanism size and your notebook. To get more guidance on this please speak to your account manager.
How to: Click File > Export > Save As PDF > Bleeds and Marks.
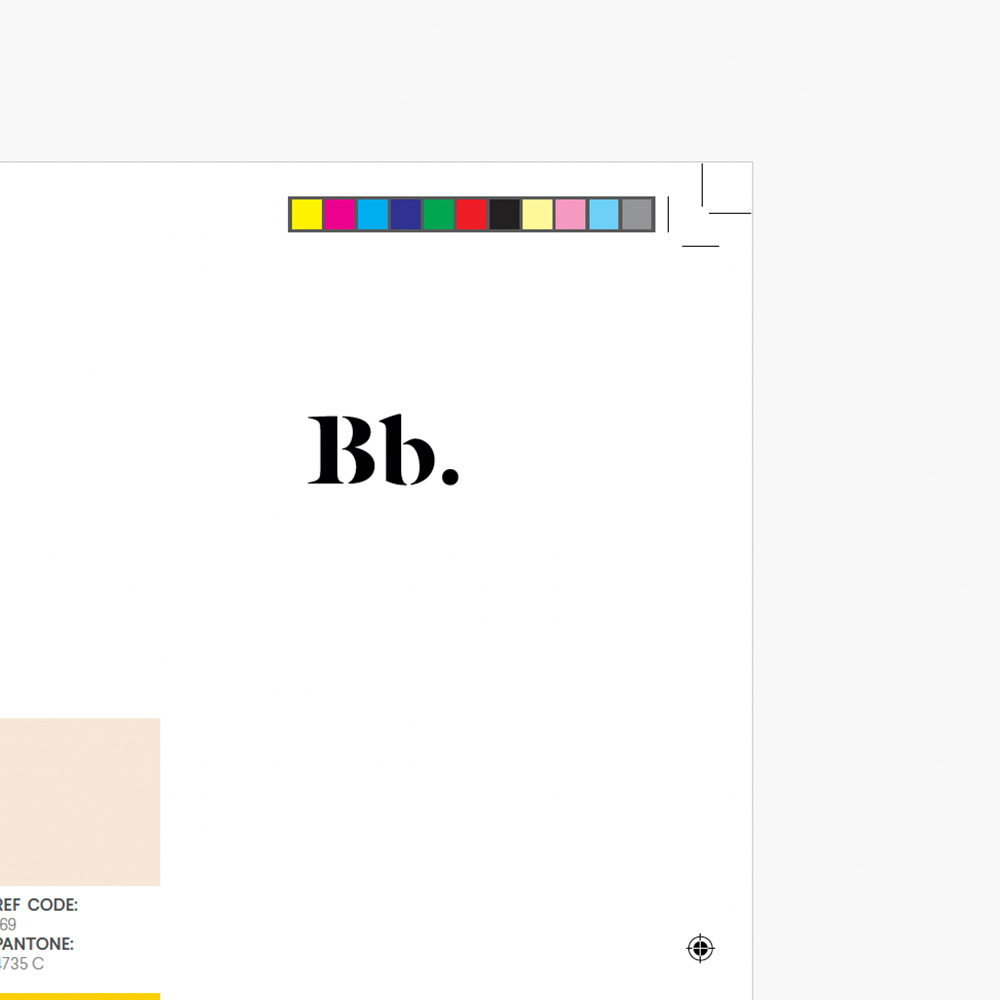
Example: exported bleeds and marks
Photos and Images
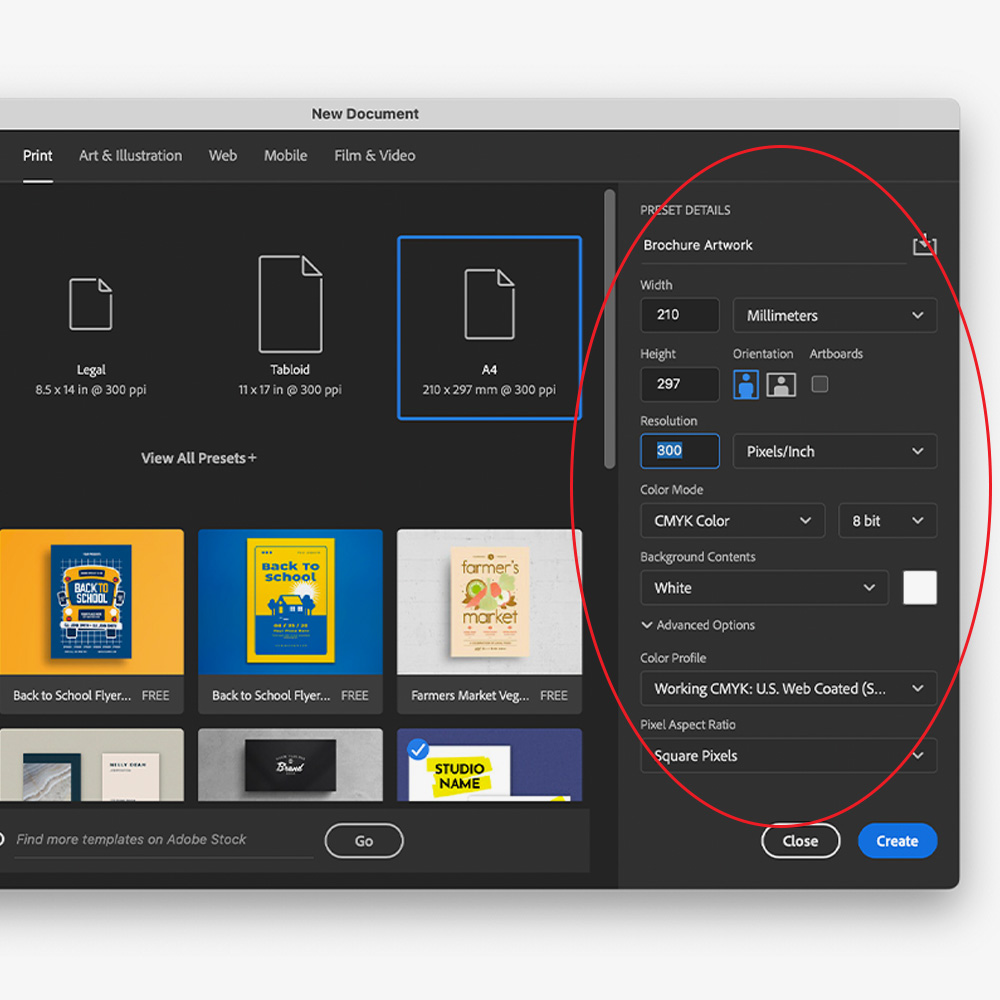
Artwork images should be exported to CMYK, 300 dpi and then embedded within your files. You can use photoshop to export your image files to the correct colour profile and resolution following these steps:
Open Photoshop > New Document > Then choose a preset or enter the document size and other details. Just ensure that your resolution is 300 and colour mode is set to CMYK.
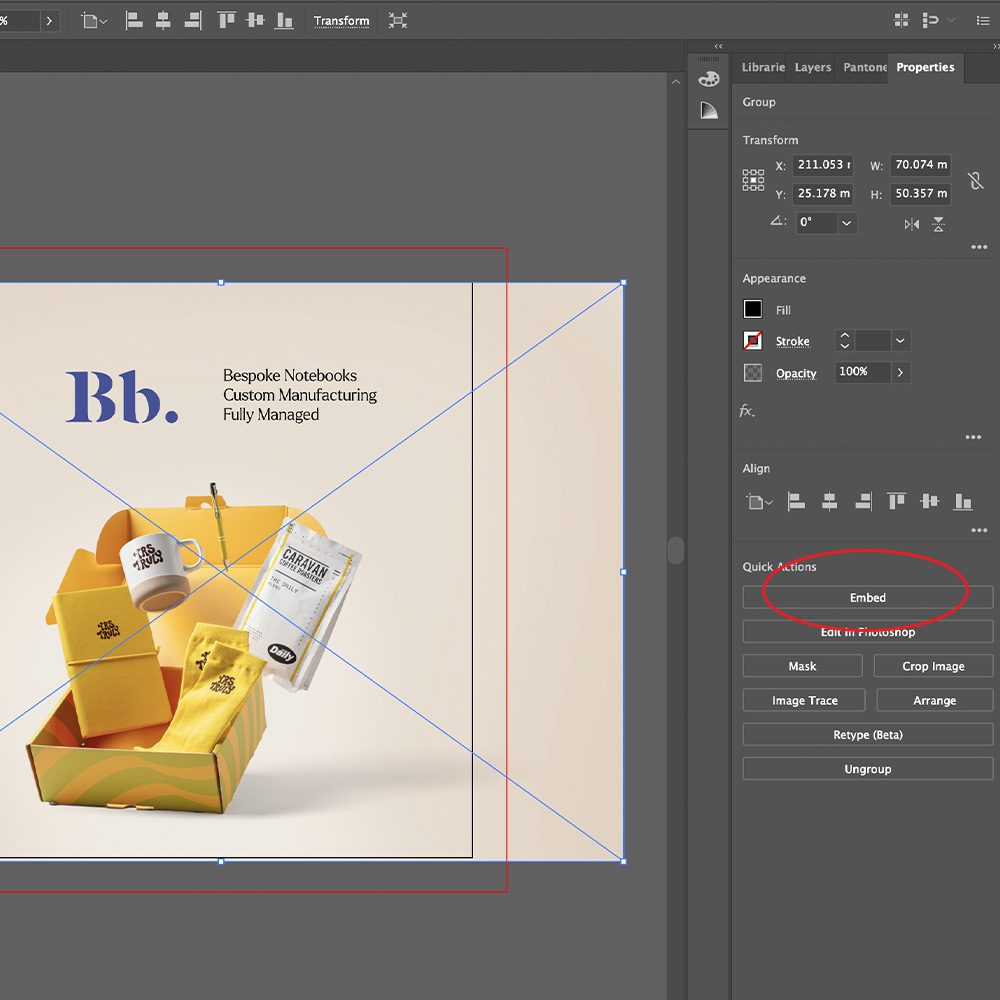
To embed a file InDesign, simply click on the image you’ve added, then click the properties panel to the right and select ‘Embed’ button.
Recommended Photoshop settings
Images must to be embedded in your Illustrator file
Colour Profiles
We require artwork to be provided in CMYK (Cyan, Magenta, Yellow, and Key/Black) for accurate colour reproduction during the printing process. Using the correct colour profile ensures that your designs come out exactly as expected, avoiding any unwanted shifts in colour. InDesign’s standard profile is CMYK but if you need to switch the colour profile, you can change the profile with just a few easy steps.
Edit > Transparency Blend Spaces > Select the CMYK profile.
Printing in B&W
Printing your notebook inside pages in Black & White is the cheapest way to print, and your document needs to be set up accordingly. To do this simply click:
File > Export > Save > Output > Colour destination > Convert To Destination > Destination > Dot Grain 25%
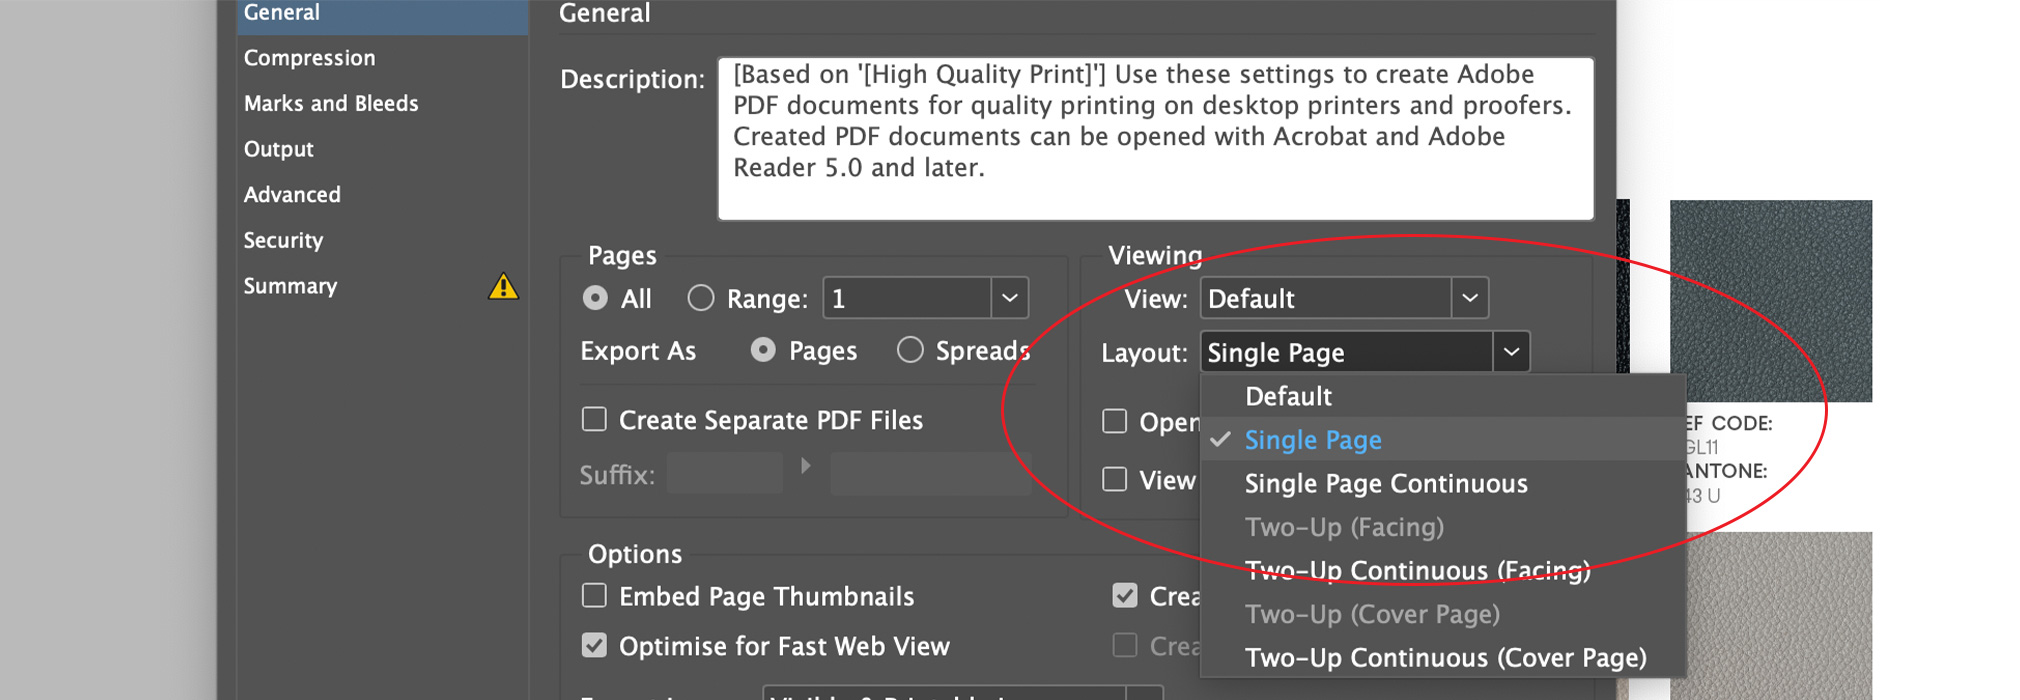
Single Page View
Your artwork file must be exported to PDF print with a single page view, you can do this by following the steps below:
Export > Save > General Settings > Viewing > View > Single.
Custom Insert Checklist:
- 5mm bleed
- 10mm margins
- 10mm glue margin on the first and last page. Glue margin on the left for the first page and on the right for the last page of the main block.
- Correct page size (A6, A5, A4)
- Page count is a multiple of 8
- Images are CMYK, 300 dpi resolution and embedded
- File is exported with all marks and bleeds
- File exported to CMYK or B&W colour profiles
- File is in single page view
- File pages are in the correct order