
Endpapers
The endpapers of a book are the pages that line the inside of your notebook cover and make up the very first page within your notebook. These are printed on a higher GSM of paper compared to the main block of pages. Endpapers are a great way to incorporate branding through colour, patterns and various designs into simple notebooks. Endpapers are also a great way to add striking colours to support your notebook overall design.

For your endpapers you can choose from four different options:
- Plain Endpapers (fully blank page Ivory or white to match notebook paper)
- Stock Endpapers (our own endpapers with a simple design and FSC® stamp)
- Colour Card (choose from available stock colours)
- Fully printed (print your own design in full colour)
Please note endpapers are repeated on the front and the back sections of your notebook by default.
Front End Paper Setup

Back End Paper Setup
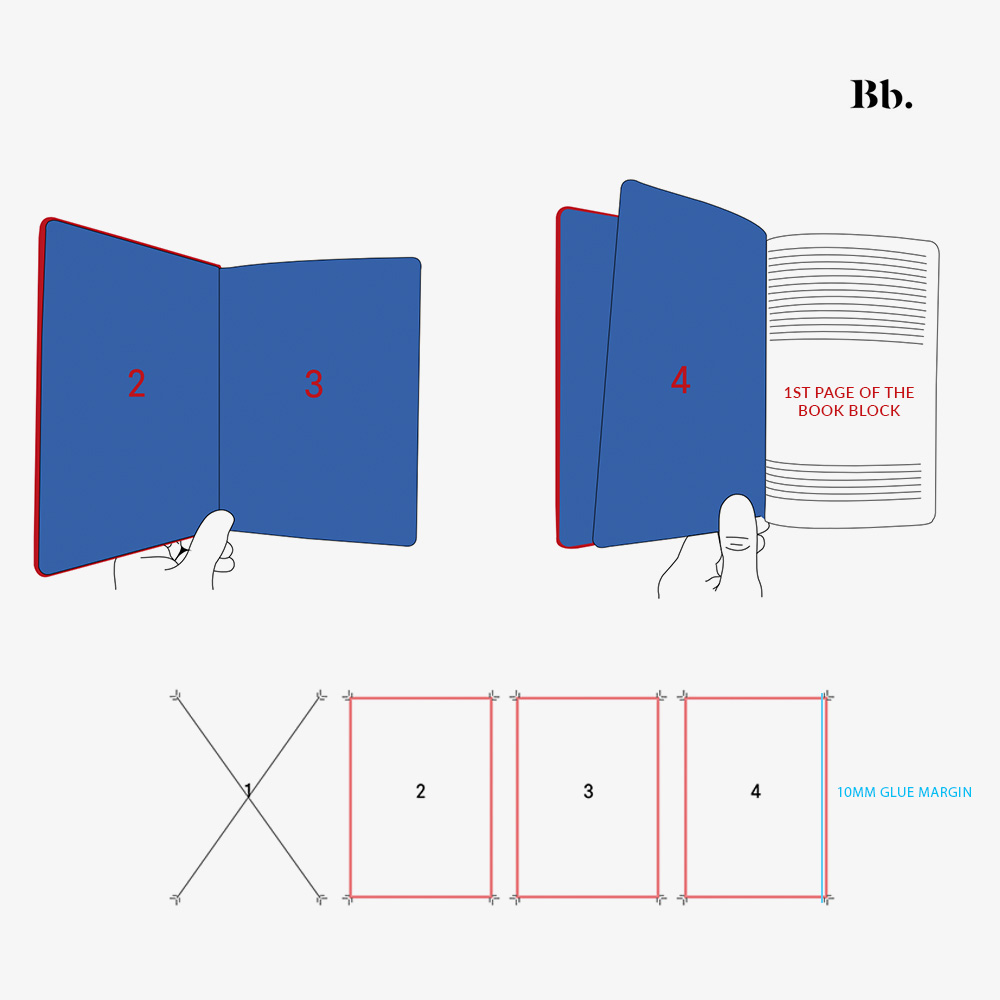
Endpapers usually require a four page PDF file, with three of those pages being visible. For example, for front end papers page ONE is left blank as this page will be covered in glue and attached to the cover, the second page is the design that is laid on the cover inside (left), page 3 is the first page on the right and page 4 is the first page on an open spread. Page four can contain the inside notebook pattern (ruled, dotted or plain) or your custom print .
It is important to note that page 4 (right hand side) on the FRONT endpaper and page 1 (left hand side) of the BACK end paper need to have a glue margin of 10mm.
End papers for cahiers, volants, kraft and ringbound books are only a single page at the front and a single page at the back of the book. If you’re not sure what is possible for your book, ask your account manager.
Please note that endpapers can only be printed across the three visible pages, if you want to include more custom printed pages at the start of your notebook, we can do this separately and process these as custom inserts.
File requirements
- Plain Endpapers: No requirements we will supply this
- Stock Endpapers: No requirements we will supply this, you can ask us about our available templates)
- Colour Card: Choose from available stock colours)
For fully printed endpapers we require you to submit a four page PDF with the following specifications. Your account manager will provide you with a template for this, alternatively you can create your own file following the guides below:
- 5mm bleed
- 10mm margins on page four of the front endpaper and page one of the back endpaper
- Correct page size (A6, A5, A4)
- Page count is a multiple of 8
- Images are CMYK, 300 dpi resolution and embedded
- If using solid colours ensure to embed your pantones
- File is exported with all marks and bleeds
- File exported to CMYK or pantone
- File is in single page view
Populating our templates
Populating our templates is very straight forward, simply open the template file with Adobe Illustrator and populate it with your designs. The template we will provide you with is ready to print and inclusive of the necessary bleed marks. Just ensure that all of the design elements you add into the template meet our requirements.
Colour Profiles
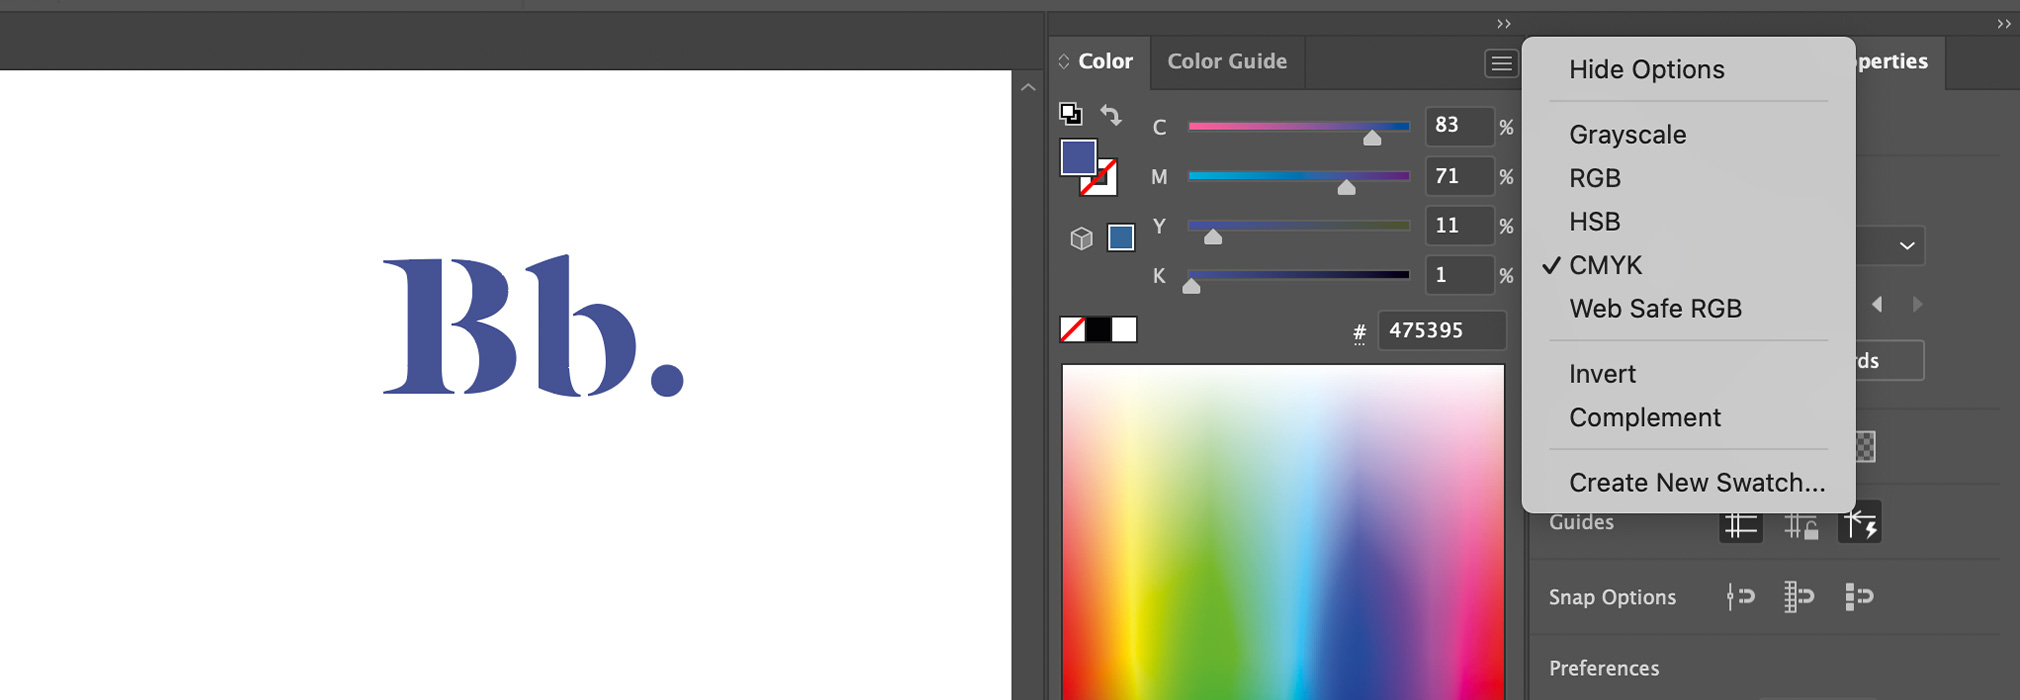
We require artwork to be provided in CMYK (Cyan, Magenta, Yellow, and Key/Black) for accurate colour reproduction during the printing process. Using the correct colour profile ensures that your designs come out exactly as expected, avoiding any unwanted shifts in colour. Illustrator allows you to embed CMYK and pantone colours directly into the file. You can do this following the steps below:
File > Colour Mode > Select the CMYK profile.
You can then see in the colour view that all the solid colours you’re inputting are set to CMYK.
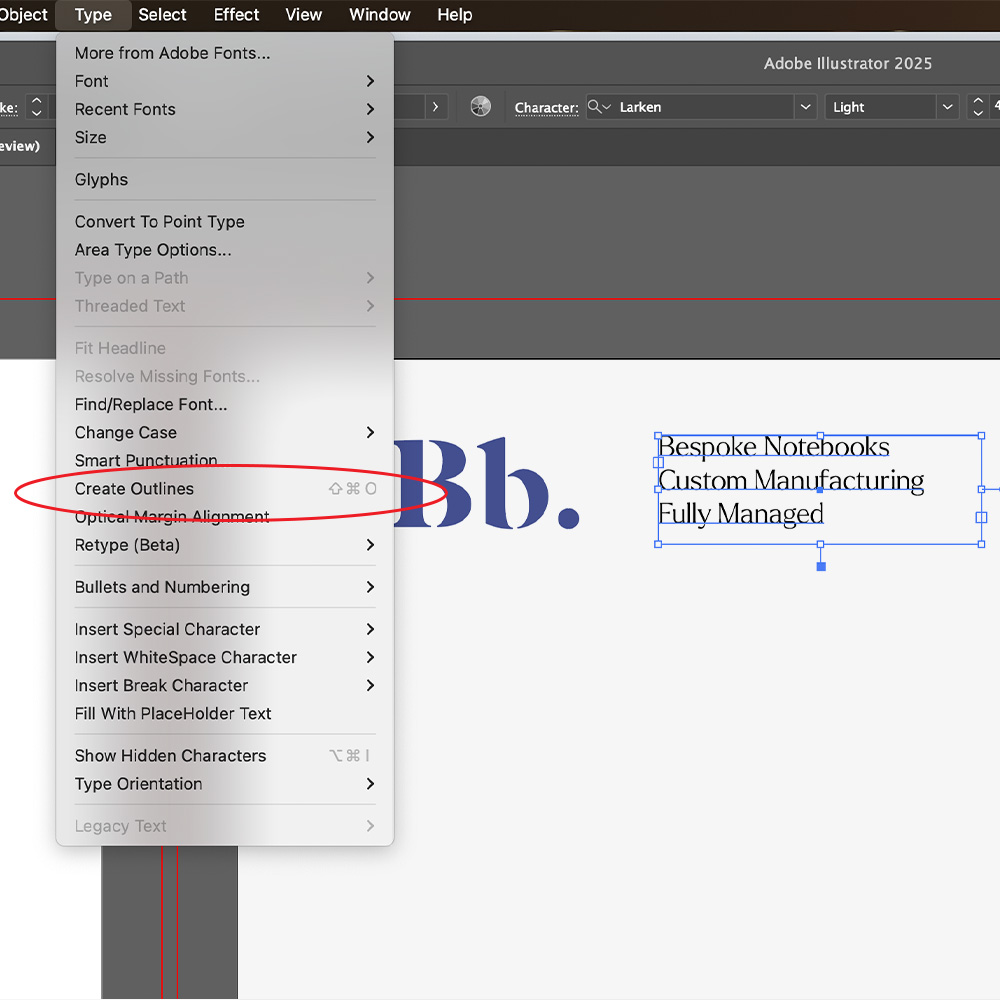
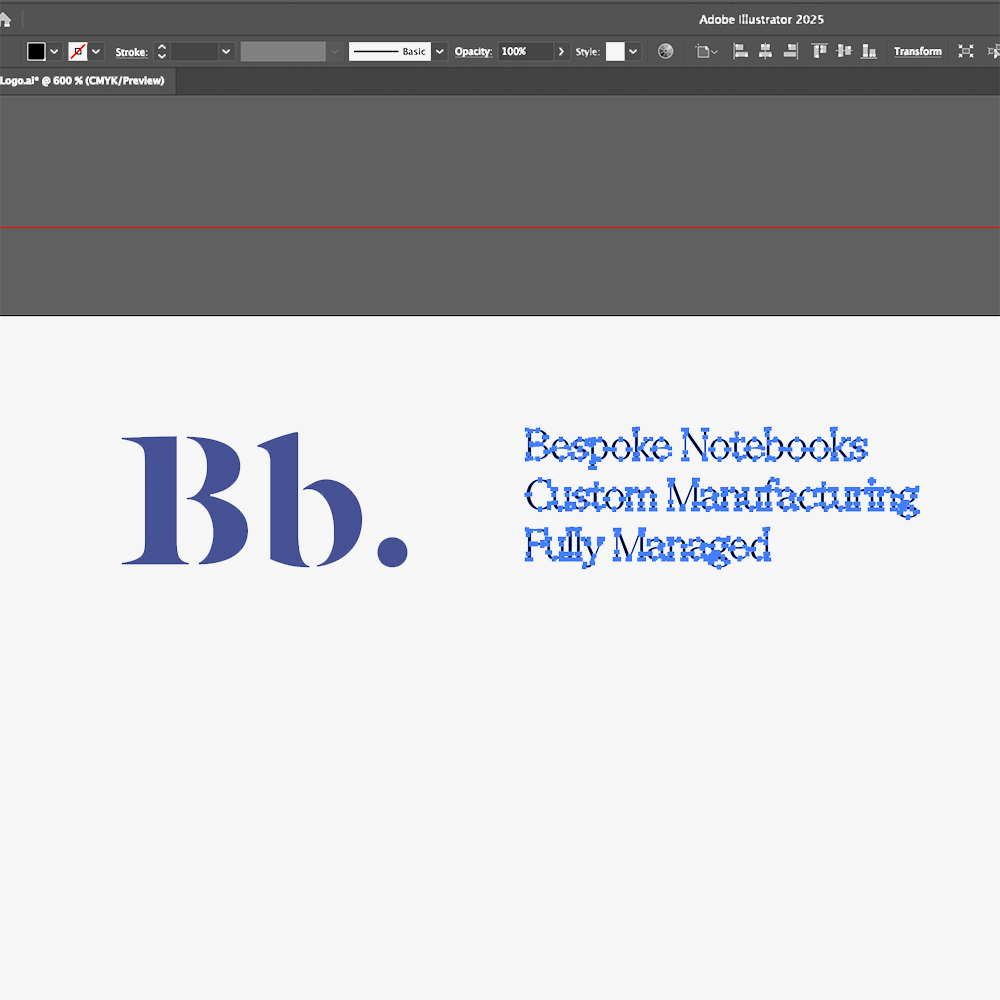
Vectorising Text
Outline your text, this ensures that there are no missing fonts or changes in typography styles when files are submitted for print.
How to: Select the text you want to outline, go to the menu and select
Type > Create Outlines (or press Shift + Ctrl + O on Windows / Shift + Command + O on Mac).
Photos and Images
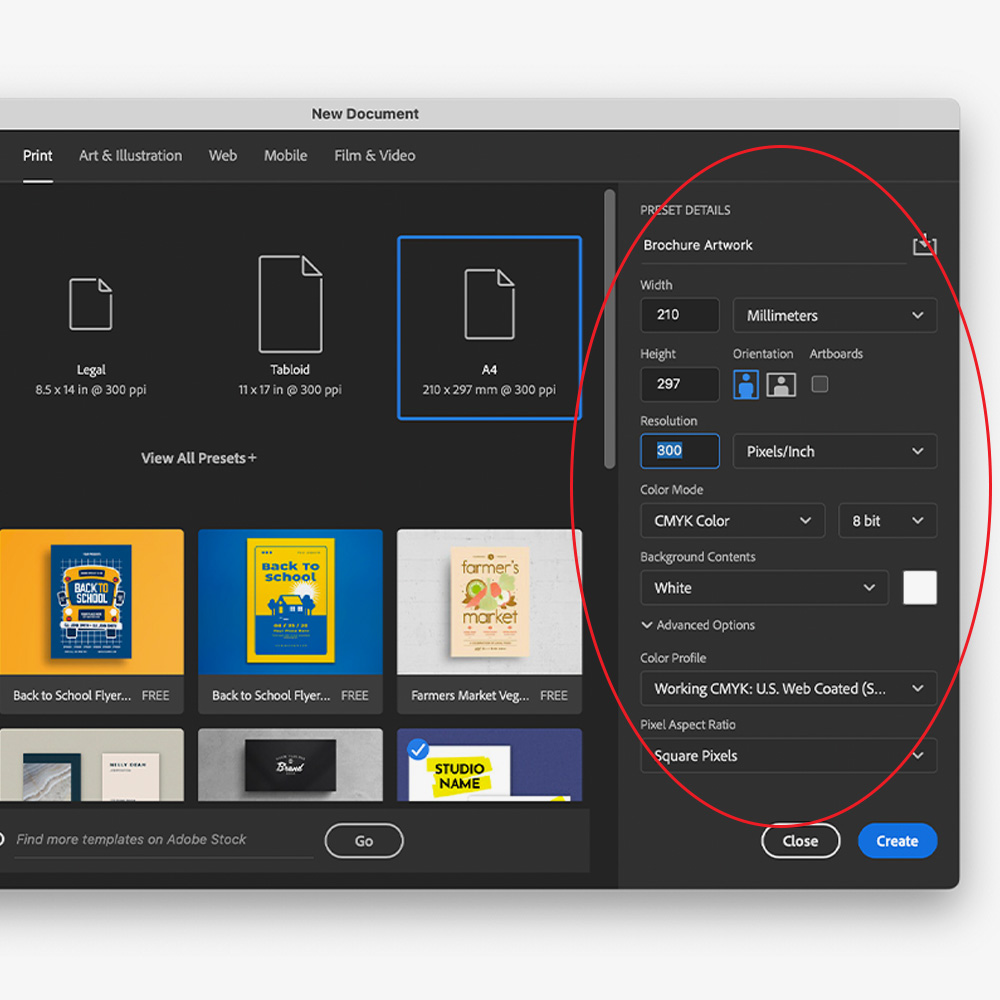
Artwork Images should be exported to CMYK, 300 dpi and then embedded within your files. You can use photoshop to export your image files to the correct colour profile and resolution following these steps:
Open Photoshop > New Document > Then choose a preset or enter the document size and remaining details. Just ensure that your resolution is 300 dpi and colour mode is set to CMYK.
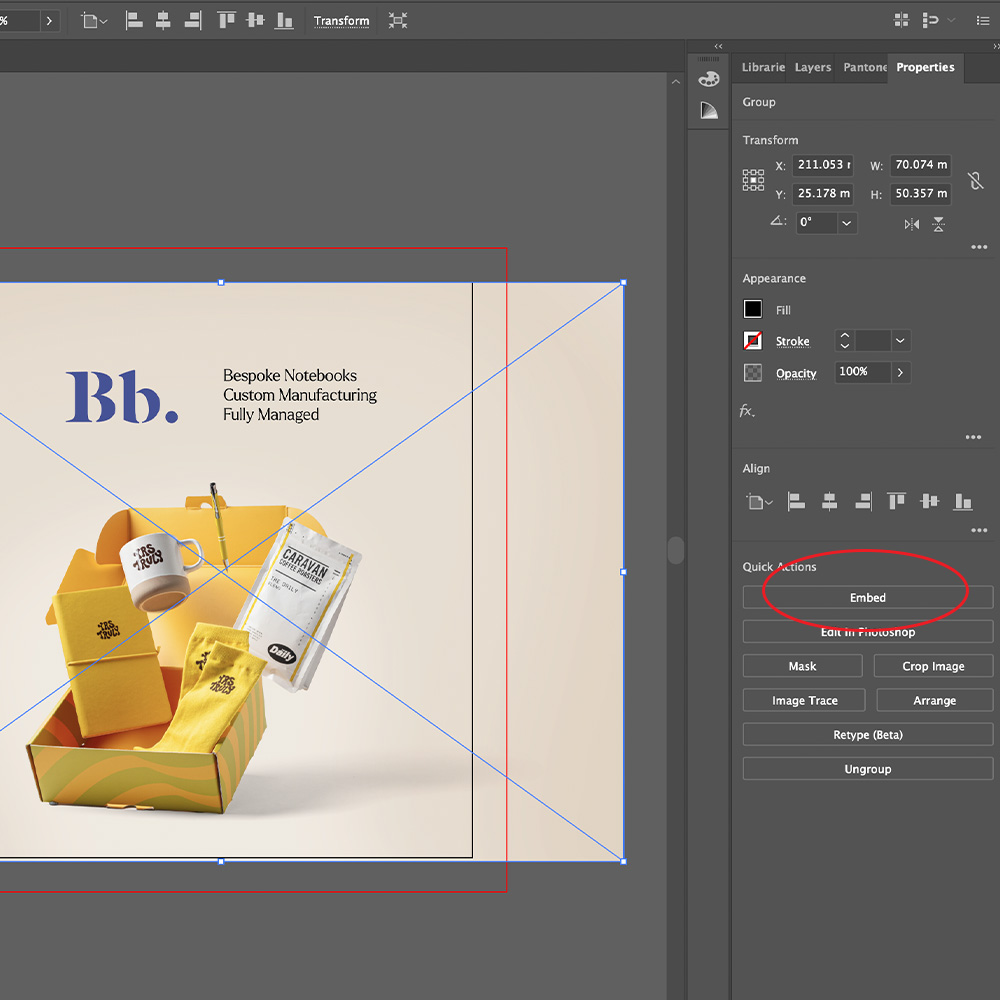
To embed a file in Illustrator, simply click on the image you’ve added, then click on the image you want to embed, go to the properties panel to the right and select the ‘Embed’ button.
Your artwork should then be ready to be saved as a PDF, this can be done by clicking:
File > Save > Click dropdown > Adobe PDF.