

Single Colour Printing
Printing in a single colour can have several advantages including cost efficiency, a sleek and minimal aesthetic, and a simpler file setup. In single colour printing, the printer uses only one ink to create text, images, or graphics. The ink is printed at varying density of the single color, giving the illusion of different shades or gradients.
To print in single colour your file needs to be printed in either single C, M, Y or K colour or a single Spot Pantone colour. There are various ways to achieve this setup including:
Converting a full colour PDF to Greyscale: If you have a print ready file that’s been designed with images and multiple colours but you’d like to print the file in a single colour, then the simplest way to convert your file is by greyscaling the file. By greyscaling your file, you’re changing all of the elements to various shades of black. If you want to print the file in a specific pantone colour then we can load the greyscaled file with a pantone of your choice.
Design your file with a particular CMYK swatch or Pantone: The best way to set up a single-colour file is to design it using a specific CMYK swatch or Pantone colour from the very beginning. Instead of creating elements in multiple colours and converting them later, it’s more efficient to draw or design all illustrations, lines, and shapes directly in the chosen CMYK or spot colour. You can of course use various densities of the chosen colour to create gradients or various shades for a multi-dimensional feel. This also ensures colour consistency, reduces conversion errors, and simplifies the printing process.
Converting an RGB or CMYK PDF file to Greyscale
To convert your PDF files to greyscale simply open the file in Adobe Acrobat and navigate to the tools section on the left side.
Use print production > Preflight > Digital printing and online publishing > Double click ‘Digital printing (B/W)’ > Save As
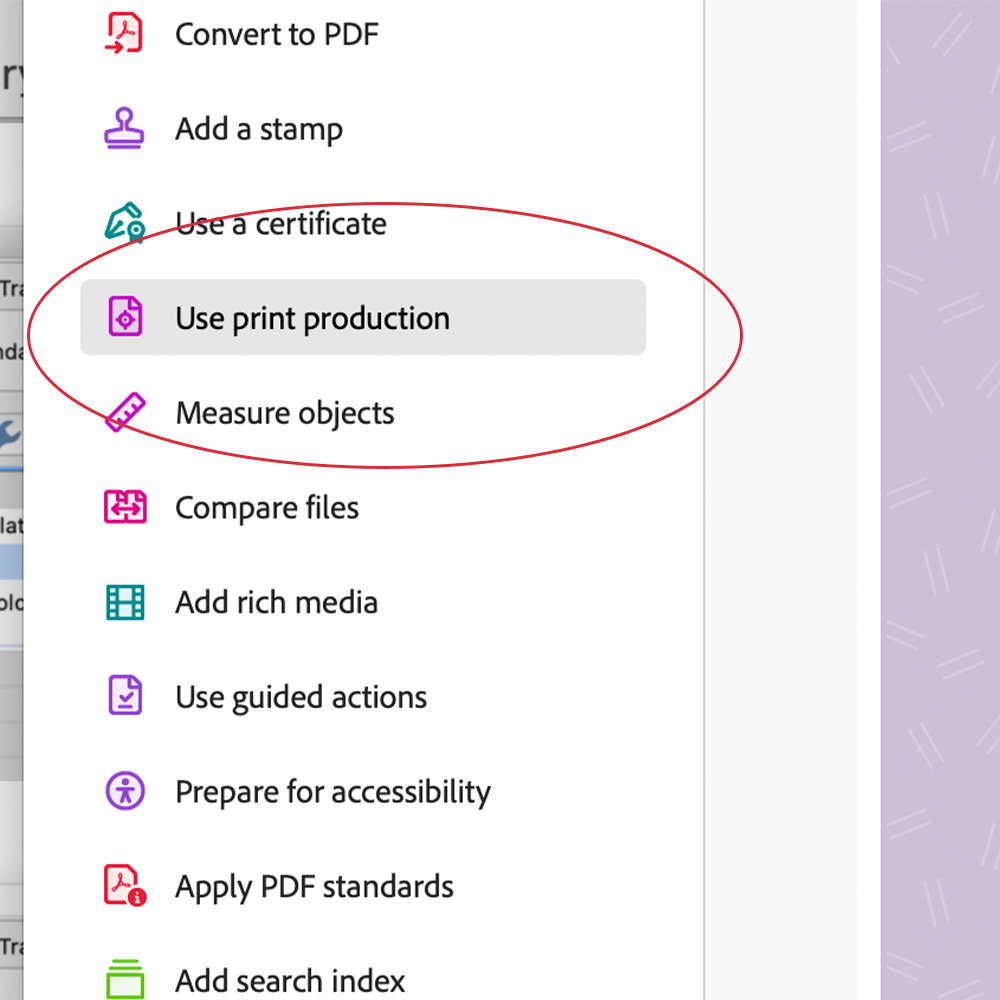
Use print production
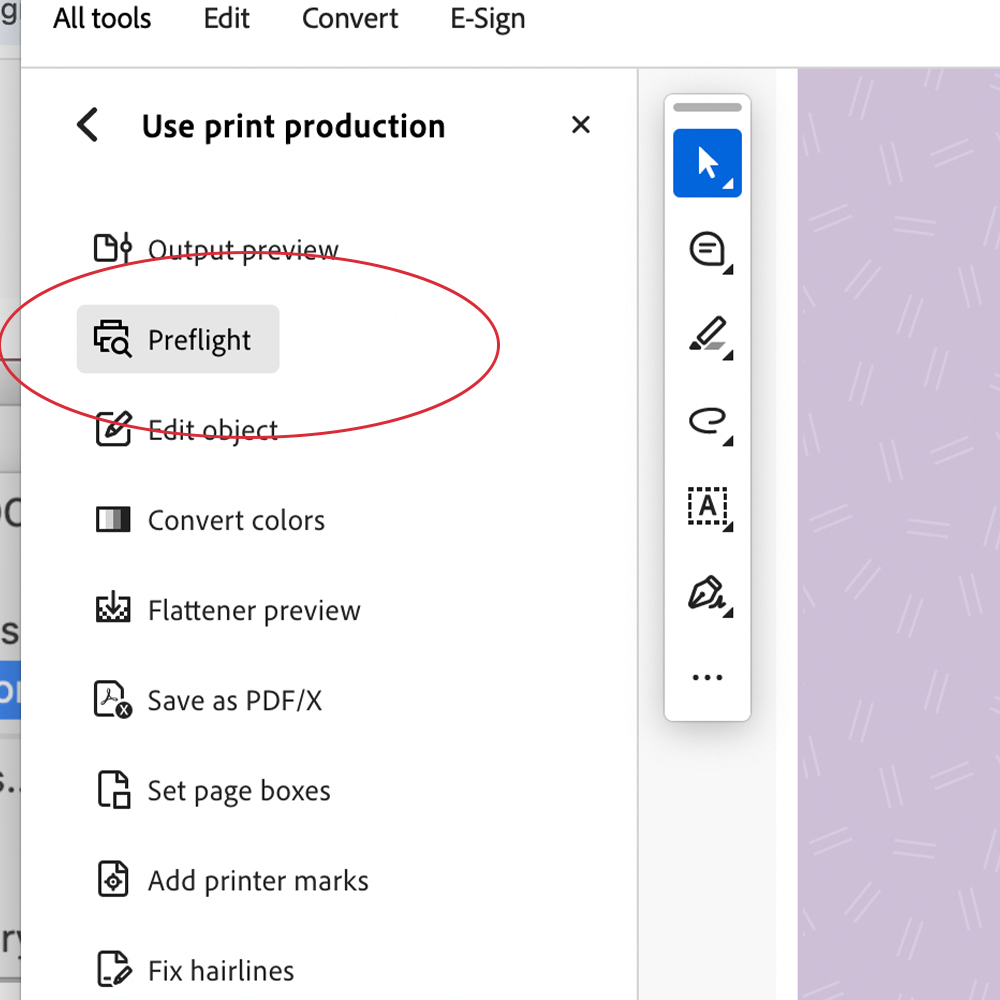
Preflight
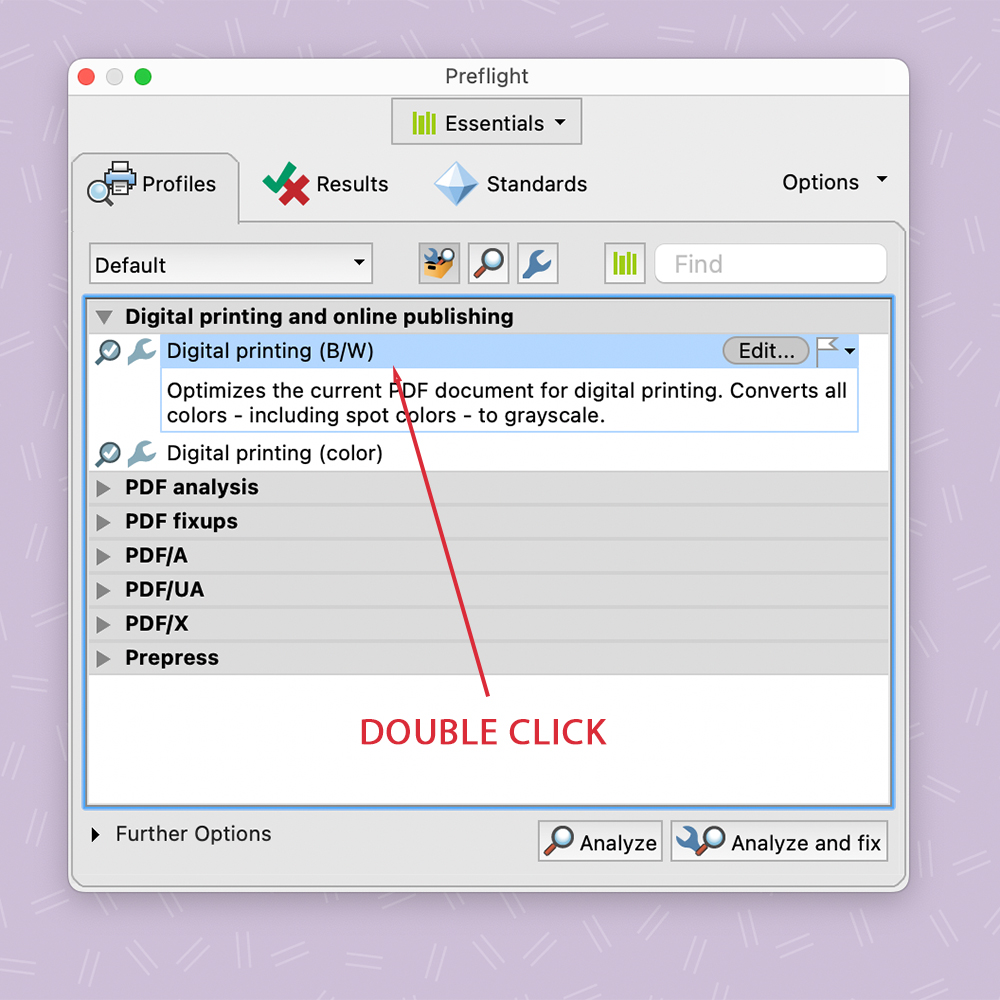
Digital Printing B&W
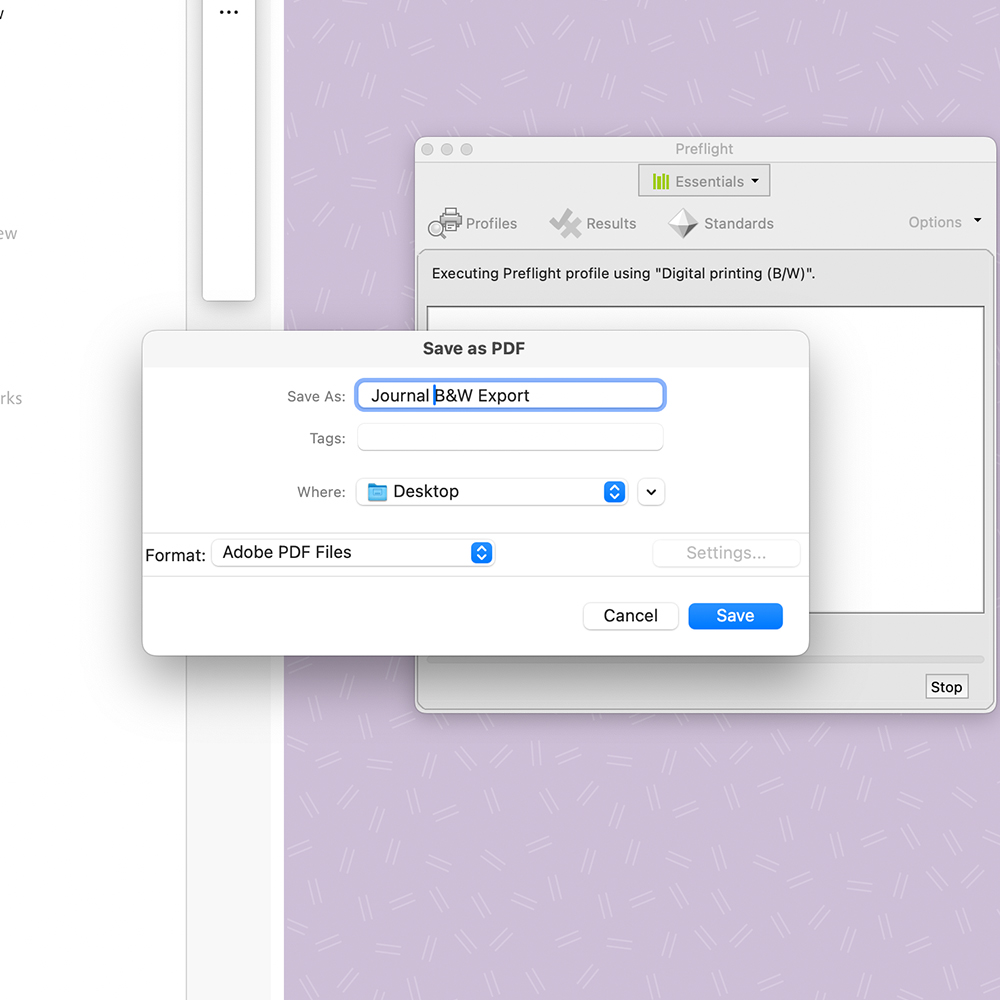
Save As a new file
Design your file in single CMYK colour
When designing your notebook file it’s much easier to design the file in single colour from the get go. To ensure you’re working in single colour, the first steps would be to create a CMYK swatch that you will use.
Click on a design element you want to add colour to, this could be a shape or text. Then in the properties panel click on ‘fill’ and select the second window named ‘colour’.
In this window you can add in CMYK values if you have an exact colour in mind, alternatively you can use the sliders to create the exact colour you want.
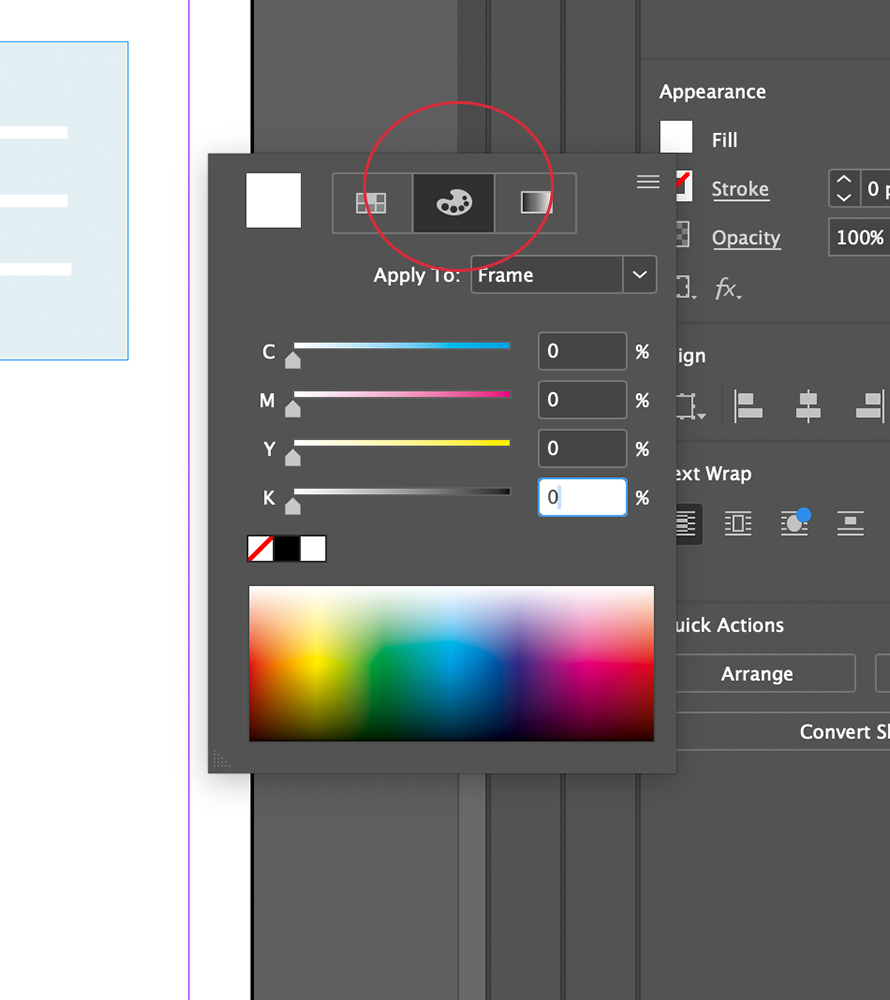
Click the CMYK colour panel and type the CMYK values
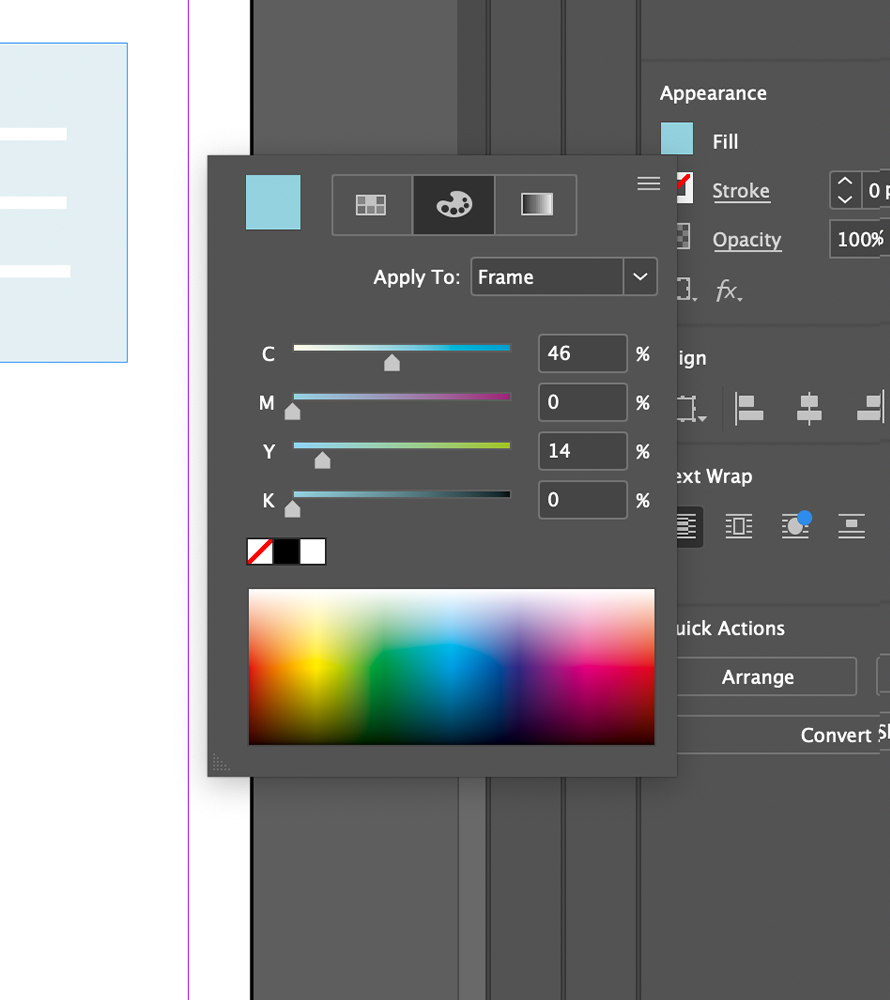
Use sliders to create the colour of your choice
Once you’ve created your CMYK colour, click back into the first ‘Swatches’ window and navigate to the bottom to click the ‘+’ symbol. By pressing the + symbol, it will automatically add your new swatch to your document so you can easily access the swatch.
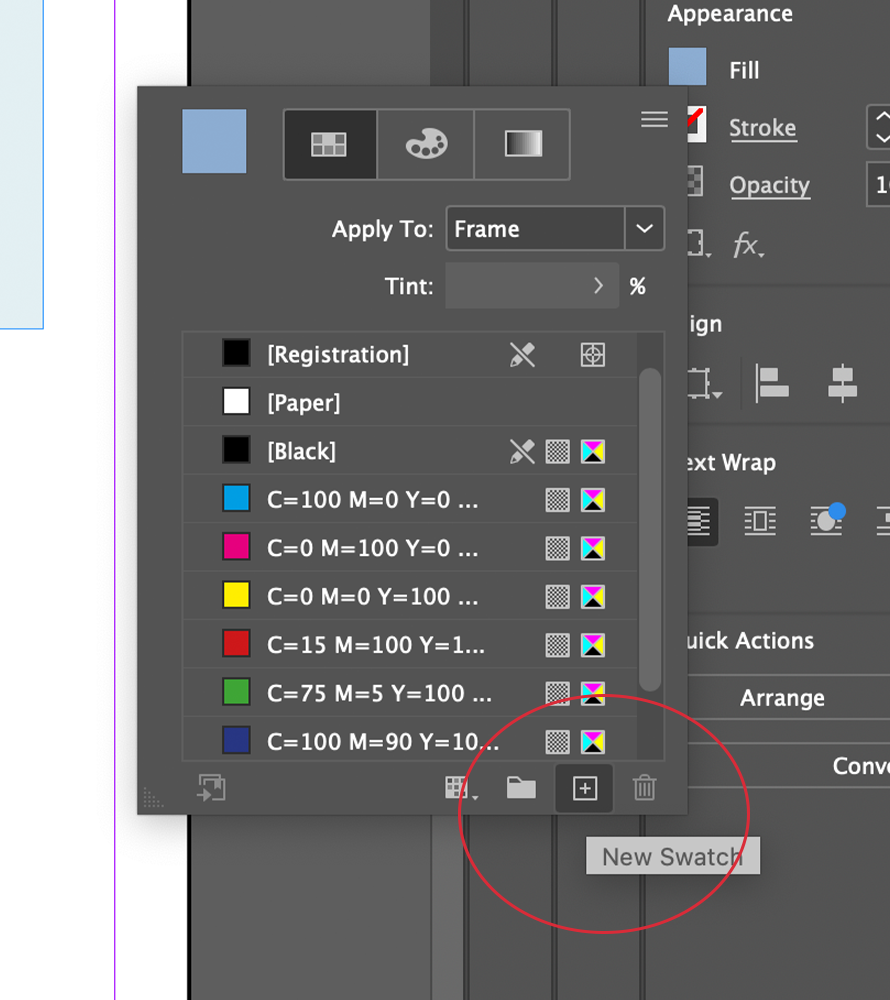
Add new colour swatch
Your swatch has now been added
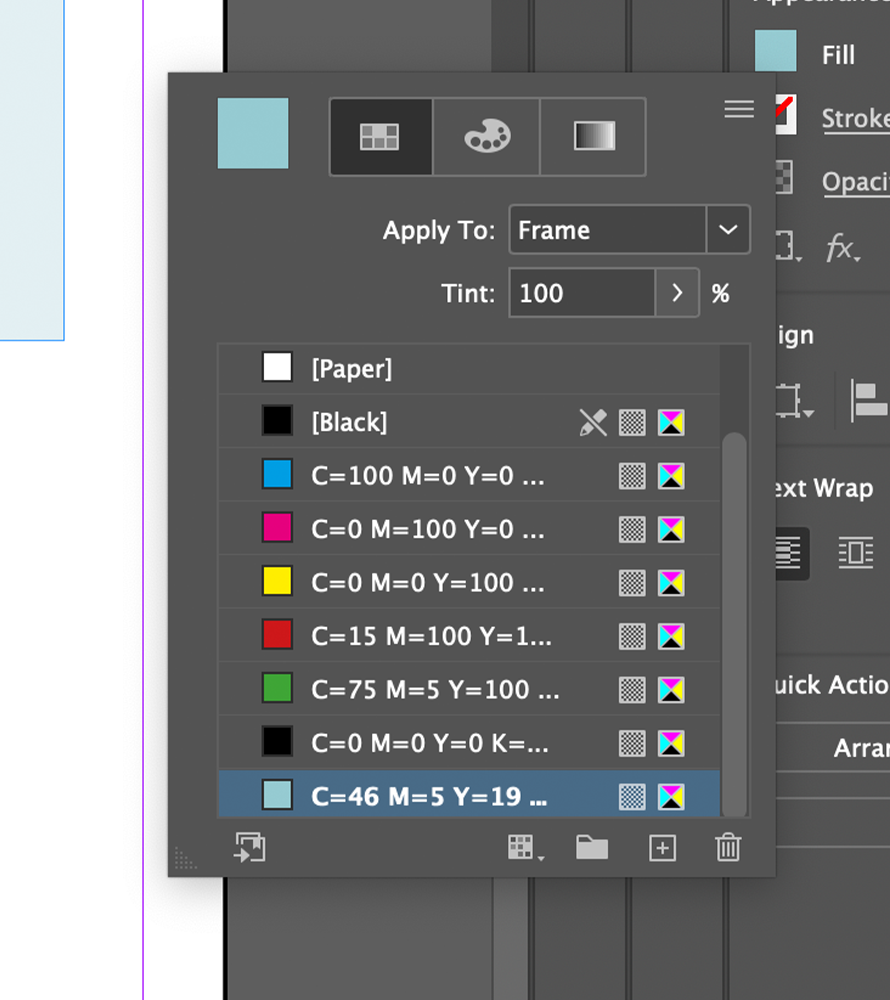
To make your designs more multi-dimensional you can use your CMYK swatch at different densities to create lighter and darker shades. To do this, you simply need to apply the swatch to a chosen element and adjust the percentage of ‘tint’ within the swatches.
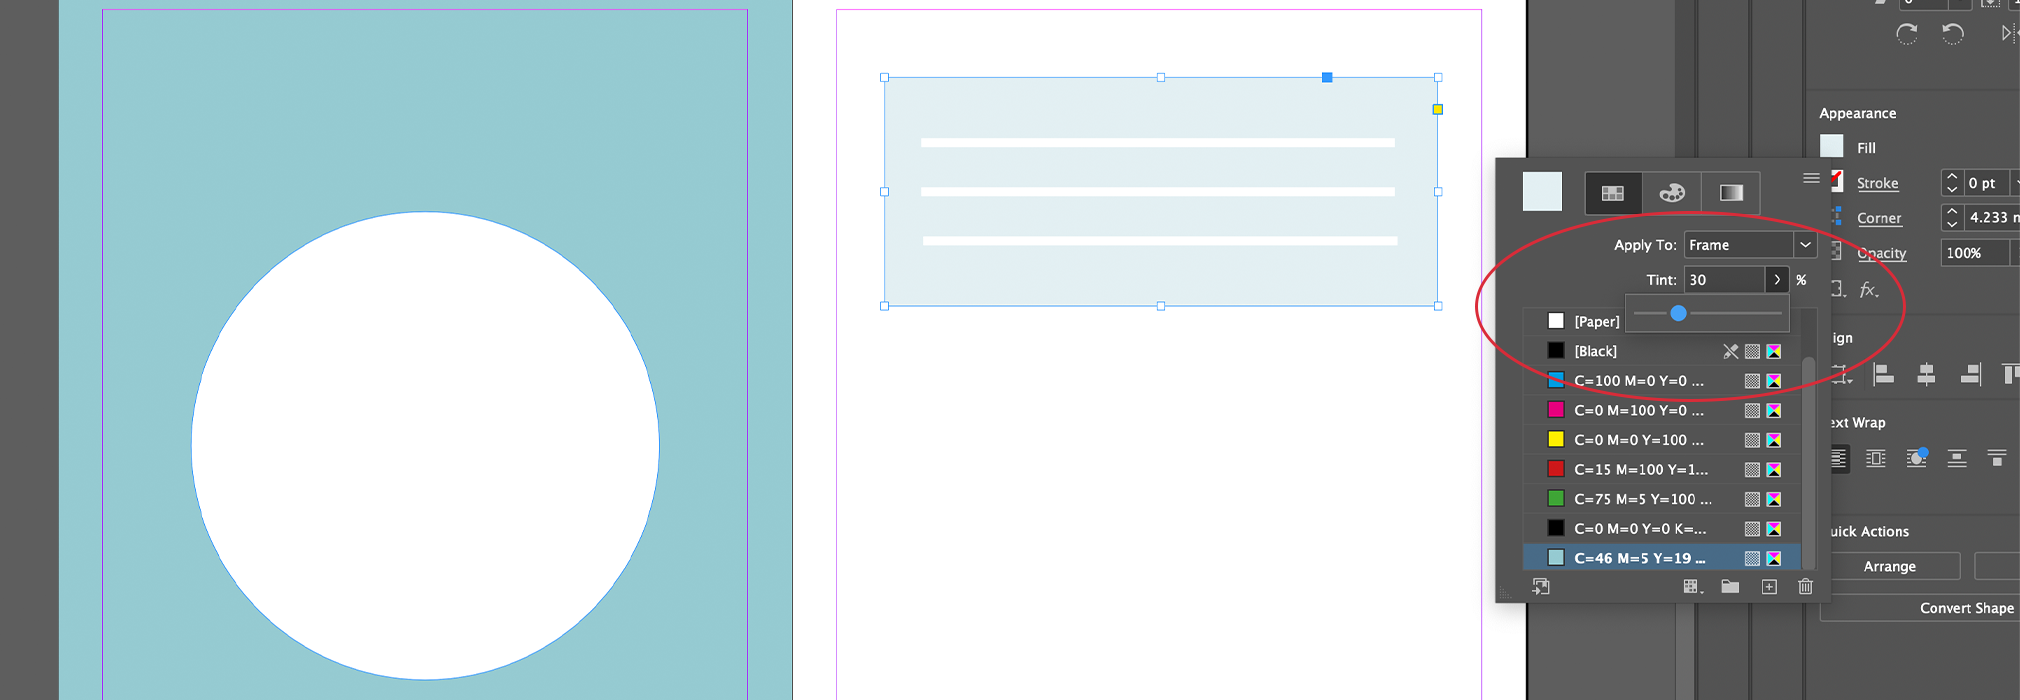
Use slider to change the tint value
Do’s: Ensure all text elements are ‘filled’ with your single swatch colour.
Use ‘paper’ swatch to create white shapes which will act as negative spaces. When printing, the printer will only print the blue colours and so the ‘white’ elements will just show the paper colour underneath.
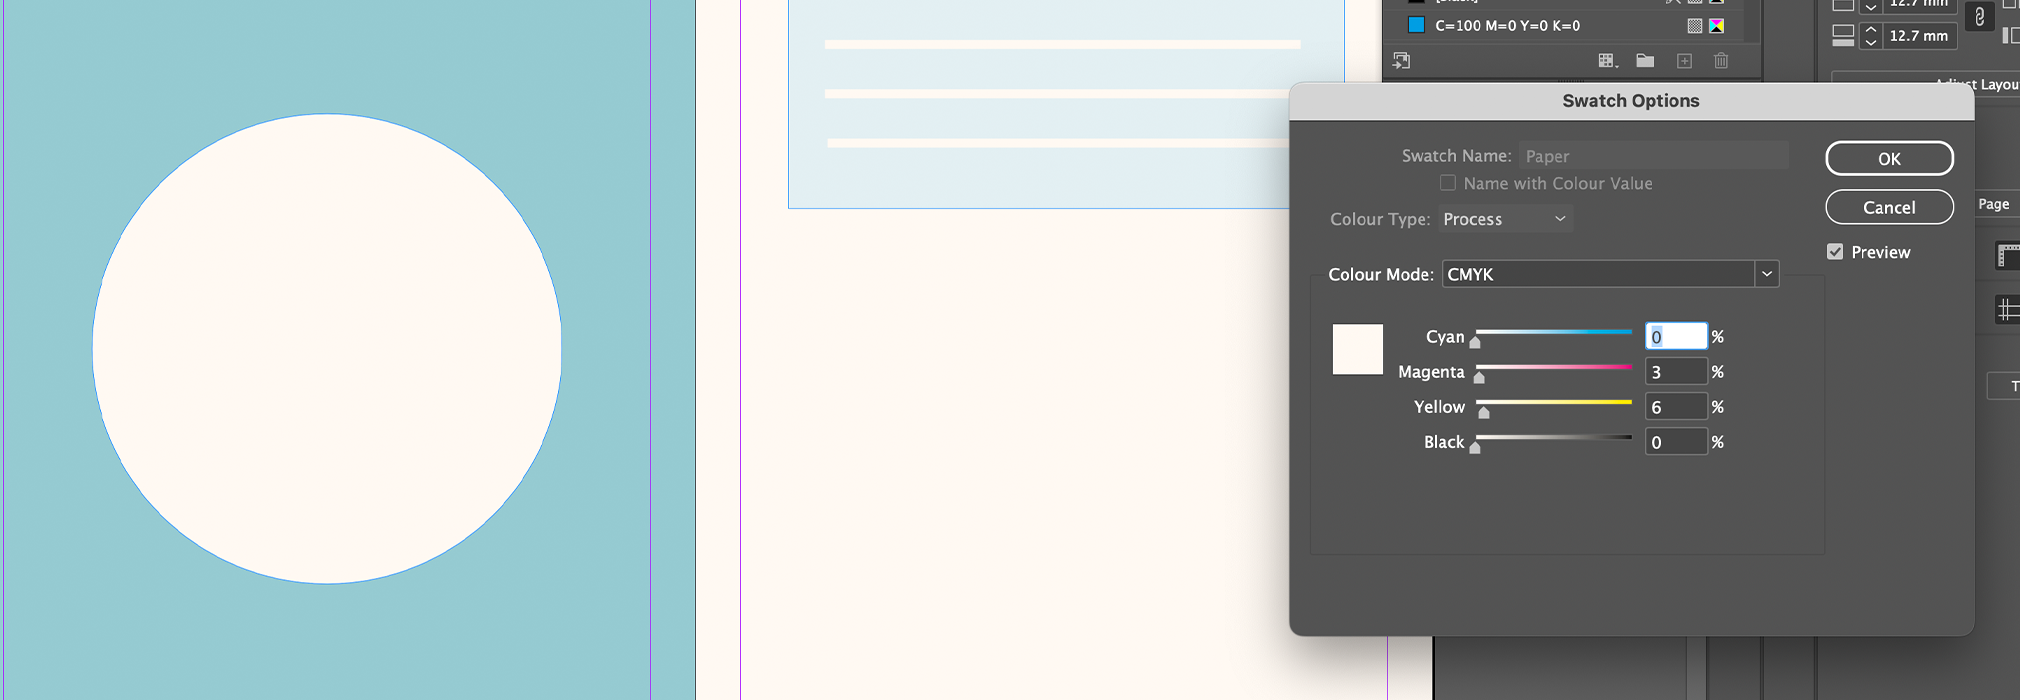
Please note the white elements will not be as brilliant as shown in preview if you’re printing on Ivory paper. For a more accurate preview, you can double click the ‘paper’ swatch and adjust the colour (5% yellow + 3% Magenta) to preview your design on ivory paper.
Use slider to change the tint value
Dont’s: Do not use any other CMYK colours including ‘Black’ and ‘Registration’ within your document, this will automatically make it a multi colour file and will no longer be suitable for single colour printing.
Once your design is complete, simply save and submit.
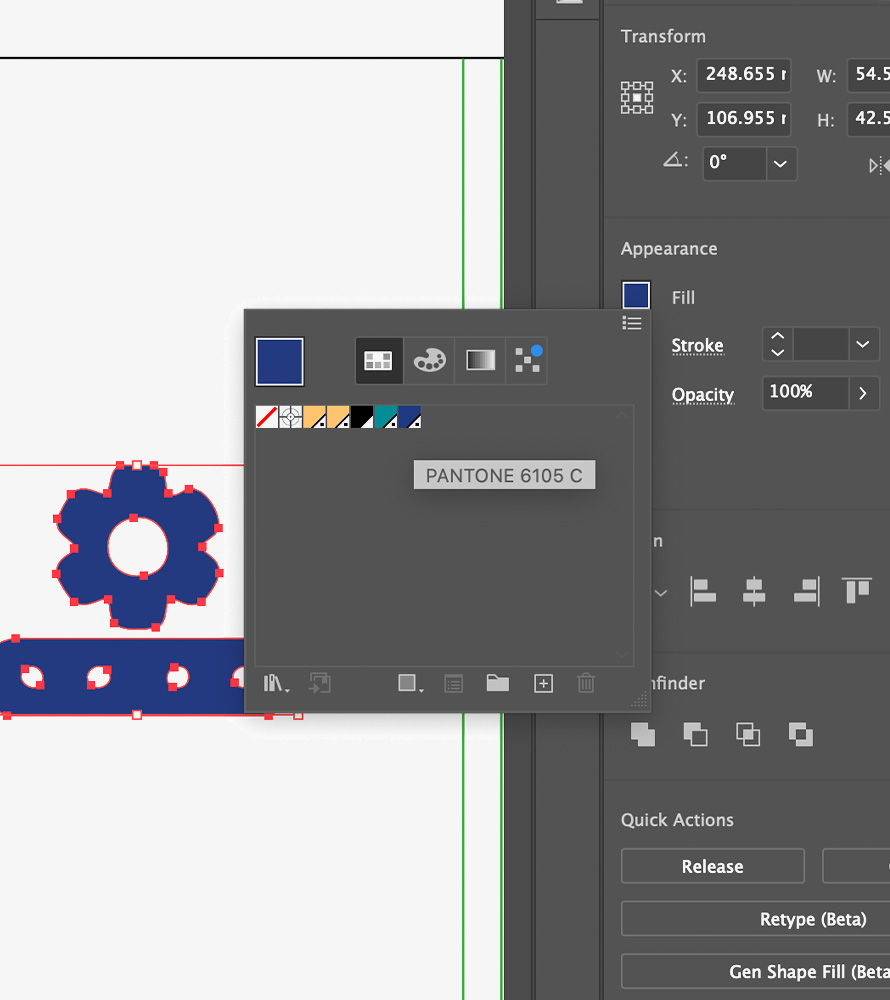
Design your file in a Single Pantone colour
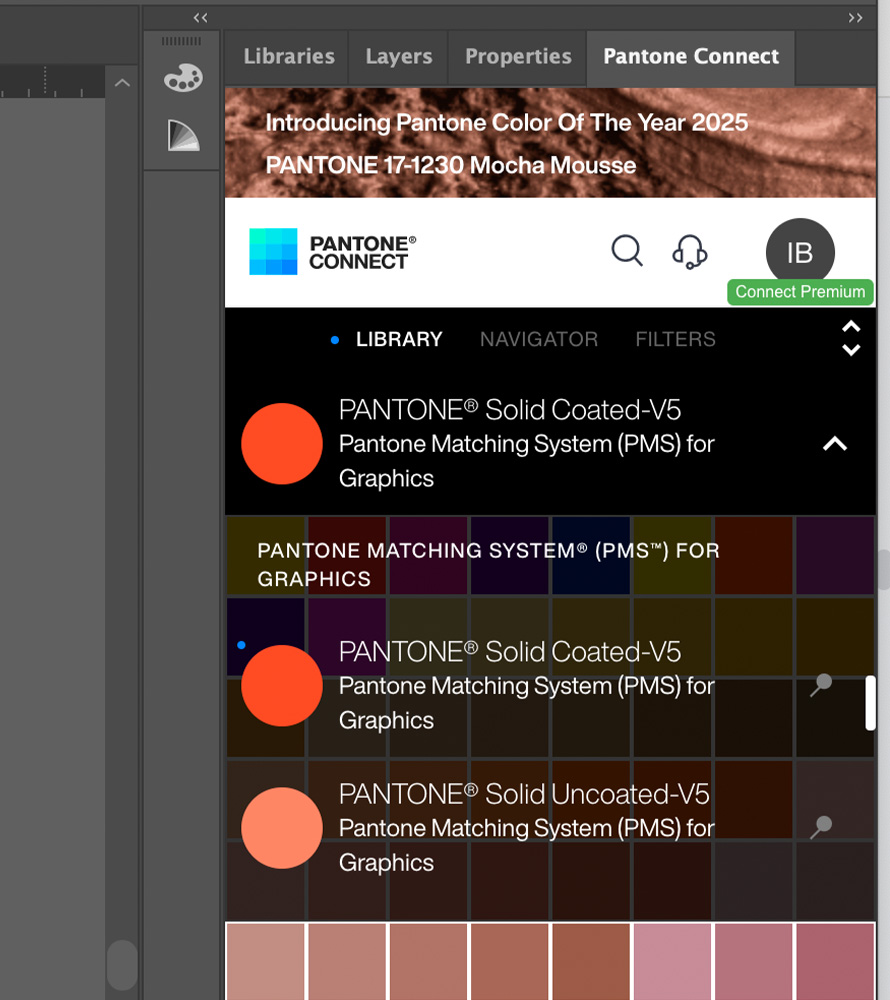
If you are featuring a pantone colour within your design then you need to embed the pantones within the file using the Pantone Connect extension. To embed your file simply:
- Open the Pantone Connect extension and select either the Solid Coated V5 or Uncoated V5 colourbooks.
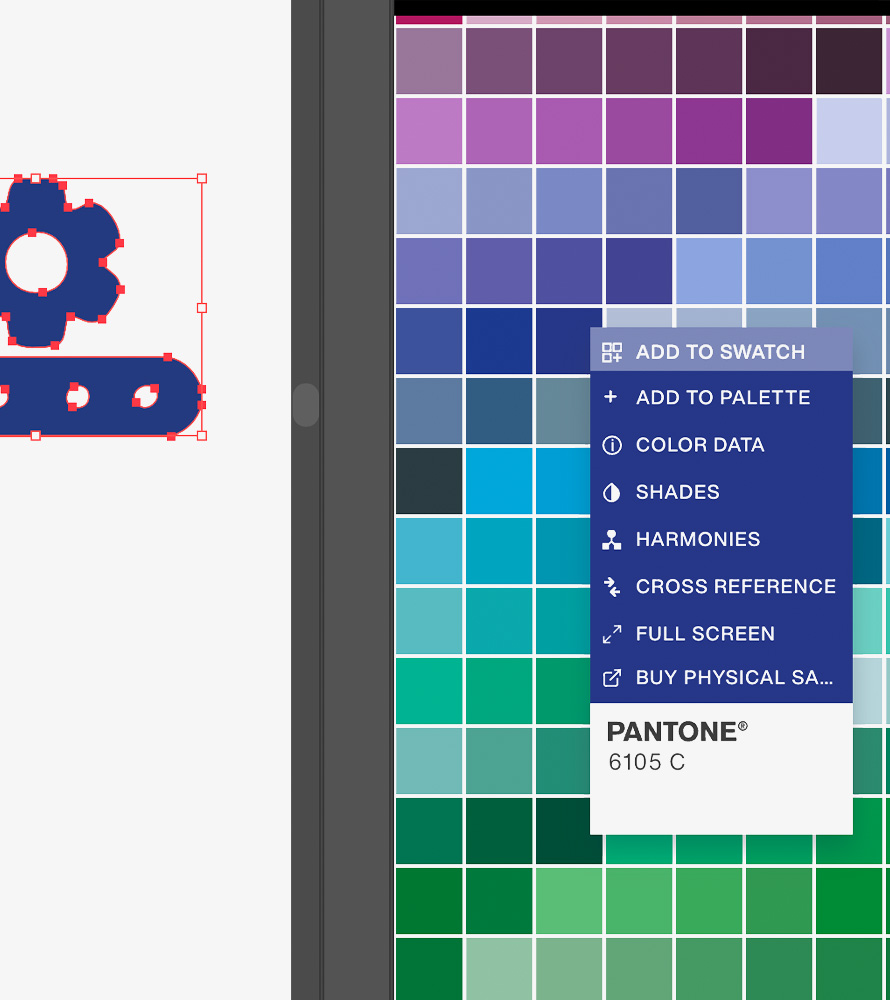
- Select the shape or text you wish to fill with colour
- Select a pantone colour inside the Pantone Connect panel
- Click the three dots shown within the pantone swatch and select ‘Add to Swatch’
If you then click into the properties panel and double click the FILL section you will see all of the embedded pantones.
Open pantone connect extension
Add selected pantone colour to swatch
Find your selected pantone in swatchbook
To make your designs more dimensional you can use your CMYK swatches at different densities to create lighter and darker shades. To do this, you simply need to apply the swatch to a chosen element and adjust the percentage of ‘tint’ within the swatches.
Adjust colour opacity to give your file more depth
Do’s: Use ‘paper’ swatch to create white shapes which will act as negative spaces. When printing, the printer will only print the embedded swatch colours and so the ‘white/paper’ elements will just show the paper colour underneath.
Please note white elements will not be as brilliant as shown in preview if you’re printing on Ivory paper. For a more accurate preview, you can double click the ‘paper’ swatch and adjust the colour (5% yellow + 3% Magenta) to preview your design on ivory paper.
Dont’s: Do not use any more than one Pantone colours within your document, this will automatically make it a multi colour file and will no longer be suitable for single colour printing.
Adjust page colour to get an accurate preview on ivory paper